Pages

Friday, September 30, 2011

Think about it Thursday

So I worked out the numbers for the SS Quilt, checked them, remembered to add borders and binding measurements and still came up short.  58" x 70"  is not enough to be a single bed size quilt like I was hoping for. I think I've been in denial.

I had a think about it and I've decided to make it bigger. Instead of a 4 x 5 layout it's now a 5 x 6 layout.  5 Dresden plates across by 6 plates down. Yep, 10 more and lots more hourglass blocks (darn, just when I thought I'd seen the last of them). Finished size about 70 x 83, still a little short but I'm going to pretend that doesn't matter.


10 More Dresdens and squares


So with a tiny bit of creative cutting - a couple of my wedges are a teeensy bit short - I managed to cut out another 10 plates worth of wedges and enough squares for the hourglass blocks. I've definitely made the most of each fat quarter. I did have a moment of panic though(jumping up and down swearing wildly) where I cut out the first plate squares without any seam allowance. But I took a big deep breath, measured and had just enough for the extra 10, with 2 inches to spare.  Phew!!


So you know what I've been doing this week. That's right, going slightly crazy spending lots of time with Ella. I'd really like to work on something else for a while but I'm being really strict and telling myself to focus and finish and stop being a wimp.

I know I keep going on about this quilt, it seems to be taking over my life, so next week I'm going to show you some other stuff that is waiting patiently for me to the finish the SS Quilt and show them some love.

Monday, September 26, 2011

Sew-Inspiration Sunday or rather, what I've been up to this week.

This week I've been a bit flat and a bit sad and a bit procrasinatey(of course it's a word!). Not only have I been trying to get better(with the "help" of two small assistants) but a member of the family passed away. So even though I felt like doing some sort of sewing to take my mind off things, anything colourful seemed wrong and anything with the machine was just too loud. Not that Ella(My Elna) is actually loud, just that the volume in my ears seemed to be turned up all the way.

I have finally managed to finish trimming all the hourglass blocks for the secret squirrel quilt(SS). Which my left elbow is very thankful for. The first hundred weren't too bad but the second hundred took forever.... 


I eventually had a small brainwave and "borrowed" some Invisi-Grip from another ruler for the 3" square I was using.  This meant that I didn't have to use so much pressure to hold it still. I then decided with about 50 left to go, that I really should go and get another rotary cutter as after I dropped mine for the second time the bit that fell off the back was making it really hard to keep the blade protector retracted. I wish I had done that before I even cut the fabric for the Dresden's, 'cause its fantastic! Smooth, sharp, no pressure required and it's not the one pictured above!

I've also been working on the plan/pattern for the Rocketship Quilt for Big Brother(BB). I'm hoping(this doesn't come back to bite me on the...) to finish either for a late November Birthday or Christmas.


It all started back in February when I asked BB what sort of quilt he would like for his new big boy bed. His answer was "a red one".  Okay, hmmmmm. Not really much to go on there but one morning(hence the coffee stain) he also mentioned a rocket, so I did a quick sketch for him and its grown from there.


I was initially going to do improvised stars all through the background and I'd made a grid so I could work out the math, then I got BB to colour in the background in the colours he would like.


Fabric for Rocketship Quilt


I did a bit of fabric searching and decided on a range called Twinkle by Yolanda Fundora for Blank Quilting. I ordered all the fabric then the whole thing stalled for a couple of months as I just wasn't happy with it but couldn't figure out why.


One day I took it out and decided to make it into a mock bed to see if that would help. It made me realise which part would be the best for the rocket. The top. Ha, ha.


Recently I came up with a new plan to simplify the whole thing.(Well kinda). I got BB to draw a rocket that he would like and we talked about what he'd like it to look like and about the colours. 


After a family colouring afternoon we came up with the rocket above. (Aside from the blue bit down the bottom left which I think is a building?)  Then we chose some fabric. The light blue is much more green than in these photos, which I now realise are pretty grey looking.  Sorry.


So this week I sat down and simplified the background into pieced strips with appliqued stars, there still looks a lot but there are about 20 less stars than my first idea.


Add the rocket and I hope you get the idea, the finished size will be around 80" x 100", which is pretty big for a single bed but he not only likes to be tightly tucked in, he also likes to bounce on his bed.

Lastly I'd like say I feel so lucky to have 14(!) lovely friends following me and that really does make me feel inspired. Inspired to keep quilting and creating and enjoy sharing with you all.  See, look at that, you've gone and cheered me up.  Thanks :)

Can't wait to see what you've been doing too!

Sunday, September 18, 2011

Sew-Inspiration Sunday

Well another week has flown by with seemingly not much achieved. I've made a couple of potholders, I've done a little work on the secret Squirrel Quilt and I've taken another look at the Rocketship quilt which I'll hopefully get to post about this week.  Oh and my iron did a kamikaze leap off the ironing board so I'm training up a new one. I have also managed to acquire a scratchy throat and a stuffy head.  The throat I can live with but the the head. Aye! (this is the part where you offer sympathy :) )

Now my inspiration this week comes from Amy at amyalamode.com/blog.  She has used a pixelated photo to create this stunning quilt for her Mother. I am loving this idea and I'm also loving the way she quilted it, which you can see better in her closeups.  If you go and have a look, check out the photo she started with - so different to the final outcome!

"Groovy" Custom Quilt for my Mom amyalamode - mosaic quilt
amyalamode - mosaic quilt
Now I've just realised this is a bit similar to last Sundays post as its very colourful.  So sorry but the stuffy head has reigned supreme and said that its okay to do that.  Now since I am a newbie blogger I have a question that I'm hoping someone with more experience can help me with.  Should I get a flickr account? Is it hard? Will it hurt??

Friday, September 16, 2011

The Adventures of Woofes and Mr Blue -Toy Superheroes with Capes


A friend suggested that obsessing over a Quilt might not be healthy and I should take a break, ("Step away from the quilt Lady!") so I decided to give it the day off.  Before I could even think what to do instead a little voice asked "Mummy, can you make Woofes a cape today?" Then a second little voice said "and Mr Blue too".

When I made the boy's superhero capes  I believe I may have mentioned, very vaguely, something about making their go-with-them-everywhere-toys one too. Little Brother has a mind like a steel trap, I'm surprised I haven't been called on this long ago. Anyhoo...


I rounded up the miscreants, Mr Blue(known associate of Mr Brown, Mr Green and Miss Monkey) and Woofes, real name Woof but goes by the alias Woofes(how Little Brother says woofs). Little Brother and Big Brother picked out the colours they wanted for a reversible cape(my idea of a simple felt one totally ignored). Little Brother wanted the same as his cape, green and black. Big brother wanted black on one side "with a batman thing Mummy", and Blue on the other. Big brother had the box of blue fabric out(says something doesn't it, that I organise my fabric by colour -nerd!) and I made a suggestion that I thought fitted his criteria, only to have him say 'that's not the right shade Mummy". Ahem, quilter's Son alert!


I got the boys to help measure and make a pattern, then spent most of the day looking for the black elastic. Very late at night I made the capes, ready to surprise them(get some peace and quiet) in the morning.


They look like little handbags don't they.


Reversible Toy Superhero Cape and Mask


With his mask on you'll never know Woofes true identity.... and Mr Blue, well he's off fighting grime!

Thursday, September 15, 2011

Friends

I'm so proud of my friend Katie.

Her Mettler Silk Thread Competition Entry Won! If you pop over to her Blog Chuord's Crafts you can see her entry and all the hard work that went into making it.  She is also part of the Small Blog Meet over at Lily's Quilts, another good reason to say hello. Hi Katie!

I said what? Help me, help me now...

Remember that quilt I've been working on?(actually I'm working on a few, I just haven't got around to sharing yet ;) ) Well its driving me crazy! Its the Secret Squirrel one that is based on the Table Runner tutorial from the Moda Bake Shop(by Kim Walus,  bittybitsandpieces.blogspot.com).


[Plate+for+your+table+24.jpg]
Dresden Plate Table Runner - bittybitsandpieces.blogspot.com

So my plan was to make it four plates across, by five down, or twenty Dresdens. Then, since I'm using mostly the same fabric, have a dark brown border, then a diamond border using the same fabric as the light coloured diamonds around the Dresden, then another brown border and binding. Oh and with smaller Dresdens in the corners. Sounded good.  Just one problem, it's not working for me.  I like the Dresdens and the diamonds around it, that make it look like a little sunburst but I get to the borders and I just go aaaaaarrrgh!!

Now I've been driving her crazy getting some help from Katie and The Husband(TH for short!) and I've narrowed it down to nothing. Yep, that's right, I'm even starting to question my plan for the middle.  It's a lot more geometric than I thought it would be and I'd like to make it softer. But how?

To give you an idea of how much I tortured TH, have a look at the many pictures below. Did I mention I shut the door and accidentally stood in front of it so he couldn't get out, oops! Thanks Darling! Most pictures have only one side of the borders changed because I didn't have enough scraps and I didn't want to cut anymore until I knew what I was doing and since I don't know what I'm doing... see where I'm going with this?  Oh, and the photos are not great since my camera decided it didn't like the quilt either and promptly went flat. So mobile phone it was.


Imagine diamonds all around and corner Dresden's HALF this size!

My Evil Friend suggested this one(RHS)

TH's favourite LHS (possibly with mini-Dresdens in the spaces)

I'm going to stick with the coloured strips binding(RHS).

Large cream diamonds and mini's in corners?
Running out of light and ideas, RHS maybe a simple brown border with mini ones in the corners?

I've realised now that unless I completely explain all the photos its probably a bit of a mess but if you cross your eyes and hold your hand up to the screen to block out the other side you can almost understand what I mean.  Almost.

Normally I'd now put the quilt in the Naughty Corner to wait it's turn. Since I'm on a deadline I can't do that. Since it's a gift I would like it to be the best I can possibly make it. I just need some help to get it there.

So have a look(feel free to giggle at my predicament) and please help, any suggestion would be greatly appreciated.

"I'd like to finish it by the end of September." I said what??

Sunday, September 11, 2011

Sew-Inspiration Sunday

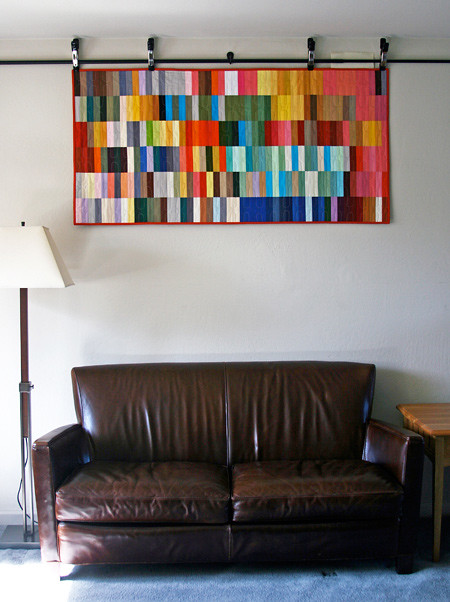
Its been a long week, Yawn, but I have found a few things colourful and inspiring. Like this pixelated colour wheel quilt by Kati From The Blue Chair.

From the Blue Chair - Pixelated Colour Wheel

I love the colour in this one and that circular quilting!

There is a rainbow one on flickr that is fantastic. It's by lightceramics but I couldn't find a website or blog to go with it. I  like the way the strips work from light to dark in each colour. Have a look and see what you think.

Finally this one also caught my eye, the way those little trails looks like they're moving down the quilt.


A Few Scraps - Cascade Quilt
Not sure what these quilts say about me, but they do tell me I need some more colour in my life. Hmmmm, I might have to work on that as a quilty idea.  Well I'm off to bed now but I will be back soon with more of that Darn Dresden Secret Squirrel Quilt to show you all.

Saturday, September 10, 2011

Secret Squirrel Progress


Dresden Plate - Hitch & Thread
First I'd just like to say a big HELLO to all who have visited through the small blog meet at Lily's Quilts.  It has been so nice to receive some lovely comments and some new friends.  I need to sort out some issues my google account is having and then I'll be able to come and say hi too! (Probably my fault, but either way it's not working that well!)

So while I haven't been able to visit and say hello, I have been quite busy.  I hope to get the secret Squirrel quilt top complete so I can send it off to be quilted, then have enough time to finish a Rocketship Quilt by November for the birthday of Big Brother. Some ninny(me!) thought for some reason a Dresden plate quilt would be fairly quick to make!

Here is my process and progress this week.


20 Plates with 20 wedges each = lots of wedges, lots of chaining....


Fun to play with!


et VoilĂ !


Dresden Plates - Hitch & Thread

20, 8 3/4" Dresden Plates!

 
<>
Miniature Dresden Plate
Oh, and I made a tiny one, 'cause I might put some in the borders. The 5c(Australian) coin in the middle is 6/8".  The finished size is 2.25" eeek!!


Shhhhhhhhh,  Secret Squirrel!

Sunday, September 4, 2011

Sew-Inspiration Sunday & Small Blog Meet

Today I've been inspired by Lily, over at Lily's Quilts.  She has some great Tutorials, Quilt-A-Longs and Links AND she is also hosting a Small Blog Meet.  Since I'm a small blog it's a great way for me to meet other bloggers, to read about and to be inspired by what they do.  Hopefully they'll stop by here and say hello too. 


Small Blog Meet


So if you have dropped by courtesy of Lily's Quilts, it's really nice to meet you and I hope you like what you see.  I'm only just getting started and still finding my true style, but I'm enjoying the journey!

Saturday, September 3, 2011

English Paper Piecing Quilt-Along!

Now before you get all excited, quilt-along, in this case, means that its going to take A-LONG time to make the quilt.  Get it? Or is that just really bad quilter humour? : )

Ahem, moving on.  I've been wanting to try English Paper Piecing(EPP) for a while now and I've managed to convince Katie, my Sister and Faye(my Mother- in-Law) to play too. Faye is going to do her favourite shape, the hexagon, in a 1 1/4" Size(the length of one side), my Sister is also doing hexagons but the 1/2" size, while Katie will be using 1/2" shapes but I'm not sure yet which ones. 

I'm going to use the 60 degree diamonds in the 1" size.  That's small enough for me! I've chosen some solid fabric to give it a more modern feel.

Fabric for English Paper Piecing

The colours in this photo above(at least on my laptop) are very close to the real colours, in the other ones below, not so much. So feel free to scroll back up to compare. 


You'll notice I've now added a light green to the selection, and now I'm not sure I need the purple but I'm just going to see how it goes. (See how relaxed I am Katie!)

Diamond Peeper, 60 degree Diamond Paper Pieces

For my paper pieces, I chose a 190gsm card, so that its fairly stiff and I can tack the fabric around it, rather than tacking through the paper and then having to unpick all those stitches later. Later I'll have a look at some places I've bookmarked that use this method and I'll share them with you.


I also purchased a 1" diamond peeper(that's the pink thing) which you can use for fussy cutting your fabric.  I am using solids for this project  so I didn't really need it but it was really handy to use when cutting my strips to size.


I'm also using my hole punch to punch holes in all the little pieces.  That's so once a shape is surrounded by pieces sewn to it, I can just pop it out and then re-use it.

60 degree Diamonds

I've now cut all my fabric.  Look at all those little stacks, aren't they cute! they just say play with me...

60 Degree Diamond Layout

So I did.  One day I might actually sew some.